Friday, October 29, 2010

Wildlife Field Trip

Today we went to the Wildlife Center of Virginia where they care for sick and injured wild animals.  The intention is to always return the animals to their natural habitat, but if that is not possible, then they keep them as "teaching animals".  Today we met an opossum,  snake, turtle and many different birds.  We also walked on the nature trail to discuss habitats and the food chain.  It was a GREAT trip and the weather could not have been better!

A volunteer at the Wildlife Center explained about the veterinary hospital and what we would see on our visit.


Peg the opossum is a teaching animal because she is very used to humans and can't be released back  into the wild.

Peg has an eye problem, but she is still able to enjoy a banana!

We looked at the birds that they had and the volunteer even asked us for suggestions on names for a new bird!

This fuzzy bird named Edie is so used to humans that she greeted us at the front of the cage and knows how to call for food. 

Here we are looking at the hawks and eagles.  There was a red tailed hawk and a young bald eagle!

We looked at the owls and this is a great horned owl that only has one eye!


We enjoyed and saw a lot of birds that live at the Wildlife Center.

On the nature trail the volunteer told us about a lot of things that we might see and should look for.

On the nature trail we talked a lot about an animal's natural habitat and what they need to survive. 

Here we are looking for animal evidence of wildlife with tracks or scat. 

We looked under a log for natural homes for small animals or bugs.  We found a millipede and a centipede.  

We looked in a stream and our leader found an large crayfish that looked like a lobster.  We teased that this was just like "Mrs. Laubscher"!

Wednesday, October 27, 2010

Explorer Posters

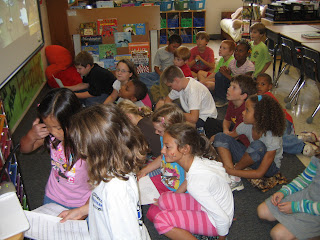
We have been studying influential explorers and decided that making our own posters for our classroom would be more meaningful.  Four different groups became "explorer experts" and each group had four different tasks.  This project took over a week and required a lot of teamwork, but the final product was well worth the effort.  

Artist
TASK: Your task is to draw a portrait of your research team’s explorer. You should use a historic portrait of your explorer from a book or the Internet to make sure your sketch is accurate. You should have a first and final draft. Make sure you include details and think about quality craftsmanship.

Ponce De Leon

Map Maker
TASK: Your task is to create a map of your explorer’s journeys. Your map should include all necessary continents, countries, and bodies of water to make your map accurate and detailed. You should have a first and final draft. Make sure you include the location where your explorer started his journey, the place where he ended, and any other important places he visited. Make sure you include a map KEY and think about quality craftsmanship.

Christopher Columbus


Fact Finder
TASK: Your task is to find all the important facts about your explorer. The facts are what make your explorer unique and are the reason why we remember him today. You will be working with a partner and will use resources like books or the Internet to search for your facts. You are an essential part of your team because without your information the Map Maker and Wordsmith will not be able to complete their jobs!
·    What is the explorer’s name and what years did he explore?
·    Where did he sail from and where did he land?
·    Why were he exploring and what did he hope to find?
·    Why was this explorer important and why do we study him?
·    What are three other unique facts that you found interesting?

Jacques Cartier

Wordsmith
TASK: Your task is to create a piece of writing for your group to present to the rest of our class to teach the other teams about your explorer. Your writing should tell at least 3-4 facts about your team’s explorer to inform your audience but should also entertain your audience and make them interested in your explorer.  Here are some possibilities:
o  Play or Skit
o  Poems – collection of haiku, small poems
o  Entry from a Captain’s Log
o  Song
Christopher Newport

Can polygons be made STRONGER?


The triangle didn't need any struts! 
Last week our class built POLYGONS like Mrs. Laubscher's class. We found out that certain polygons were stronger than others but we wondered if the weak polygons could be made stronger. This week we investigated our question. We used additional strips of paper, called struts, to reinforce the weaker polygons. You can see that we had to add struts to the square, pentagon, hexagon, heptagon and octagon to make them more stable. Guess what we found out...there is actually a pattern to how many struts must be added to each shape! We realized that patterns are EVERYWHERE in math, we just need to look closely to find them. 
What do you notice about the struts?
Believe it or not, we proved that the triangle is indeed the strongest polygon. Do you notice what shape is made when the struts are added to the square, pentagon, hexagon, heptagon and octagon? Look closely...


When we added struts we realized they just cut the polygons into small triangles! Pretty amazing, huh? Check out some of the patterns we noticed:


Tave used a table to organize the patterns he noticed:
Can you see the growing pattern in the # of struts and the # of triangles? 


Liam used words to explain his thinking about polygons:

Tuesday, October 26, 2010

Bridge Building

Today we were challenged to build a bridge with only pipe cleaners, straws and a small piece of tape.  We had to use our knowledge of shapes to make the strongest bridge.  Every bridge had to be at least 12 inches long and 3 inches high.  Each bridge also needed to use at least 4 different polygons.  It was tested between two chairs to see how many "cars" it could hold.

We learned:

Abigail - We started with using our sketch and realized that the strong shapes would work well as a base. Then after we put our shapes together we put our road on top. 

Ewing - You don't want to make your shapes too big because they tip over a lot more easily and don't hold that much weight.  We used more small shapes to make out bridge stronger with space between the pipe cleaners to make lots of tiny rectangles.


Kylie - We were going to use our original plan, but we found out that if you do the shapes on the top it didn't work, so we decided to use the shapes on the side and it worked a lot better.  The shapes don't need to be filled in.  

Amanda - It seems like we had to change everything on our bridge because our first one was too big and kept falling over.  We decided to cut the straws to make them shorter and stronger to hold our bridge better.  The top of our bridge was not straight, so we had to make a new one.  It wasn't easy to make because the legs kept falling out and not staying together, so we did decide to use our emergency tape.

Sarah - We needed to add more shapes on our bridge, so we had the idea to design details, such as a stop sign and a trash can.

Drew - I learned that once you make your design it might not work out very well, so you actually might want to decide to make another design.  We noticed that our bridge was not working out because the square was not the strongest shape and when they were leaning on each other it became a triangle and that became the legs.   This made our bridge much more stable.

Jamie - I learned that it was easier to work in a group rather than by yourself because you don't always have all of the ideas and when your idea does not work out, then someone else can think of another idea.  

Monday, October 25, 2010

Teaching College Students

Students watching the class at Indiana University on the Active Board.
Interacting with Skype.
Today we had the unique opportunity as a class to "teach" college students about our writing.  Ms. Beth Buchholz (former Stony Point third grade teacher) is now getting her PhD in Education at Indiana University and the class she teaches wanted to know about our writing process.  Ms. Buchholz's students are in their third year of education classes and they viewed our published poems and art on our blog.  Today we Skyped with the class and they listened as we shared our writing process and poems.  Then they asked us questions and individual students answered the questions from their own perspective.  Our class was absolutely FANTASTIC and very impressive with their knowledge of the writing process.  They talked about their strengths, weaknesses, thoughts, feelings and the final product!  Our Skype lasted about 40 minutes and the kids were listening, engaged and participating the entire time.  To say that we utilized technology today would be an understatement!  Who would have thought that third graders from Virginia could share and have a conversation with college students in Indiana on a Monday afternoon?  What a powerful lesson.

Explaining our writing process to the college students and sharing our poetry.